How do we add geometric shapes in Excel, and can they be custom-designed? Excel provides over 16 dozen geometric shapes that you can size and manipulate to your specific needs, plus hundreds of special effects to customize those shapes. Additional shapes are available in the form of icons, pictures, or 3D Models, all of which can be sized, manipulated, and custom-designed.
Insert Shapes, Icons, Pictures, & 3D Models
1. For Shapes, select INSERT > Illustrations > Shapes and choose one from the drop-down list.
2. For Icons, select INSERT > Illustrations > Icons and choose one from the huge drop-down submenu, which is organized by category.
3. Shapes and icons are also available as online pictures. Select INSERT > Illustrations > Online Pictures and type Icons or Shapes in the search box, then press Enter. Locate the shape or icon you need, click once to highlight, then click the Insert button.
4. The best shapes are under INSERT > Illustrations > 3D Models. The sizing and manipulation options for the 3D Models are amazing! You can change the X, Y, or Z Rotation, change the Camera View for the X, Y, and Z Position or Look-at-Point; or you can select a three-dimensional view from a list of preset options.
NOTE: When you select Shapes, as soon as you click the one you want, Excel inserts the drawing crosshair into your spreadsheet, which then requires you to hold down the left mouse button and drag down and over to "draw" the shape. With the other INSERT > Illustrations (Icons, Online Pictures, 3d Models, etc.), Excel provides a graphical submenu for you to select from the image library. Once you click the image you want, you must then click the Insert button for the image to appear on the spreadsheet.
Insert Shapes, Icons, Pictures, or 3D Models
Sizing the Illustrations
1. Sizing the illustrations is a familiar process that you have likely used in other programs. After you insert a shape, icon, picture, or 3D model, notice the four circles (called image "handles") in the four corners, plus the circles located at the middle top and bottom, and both sides.
2. Place your cursor on one of the circles (e.g., bottom right), hold down the left mouse button and drag down and over to enlarge the image; or drag up and to the left to reduce it. Those are just suggestions. You can drag up or down, left or right, based on whatever feels comfortable to you and produces the desired effect.
NOTE: Use the corner circles/handles to size the image proportionally. Use the mid-top, mid bottom, mid-left, or mid-right circles to distort the image. For example, if you use the top or bottom middle circle, the image gets shorter and wider (or fatter). If you use the middle-side circles, the image stretches longer and thinner.
 JD Sartain / IDG Worldwide
02 Size or distort the illustrations using the image handles
Editing the Illustrations
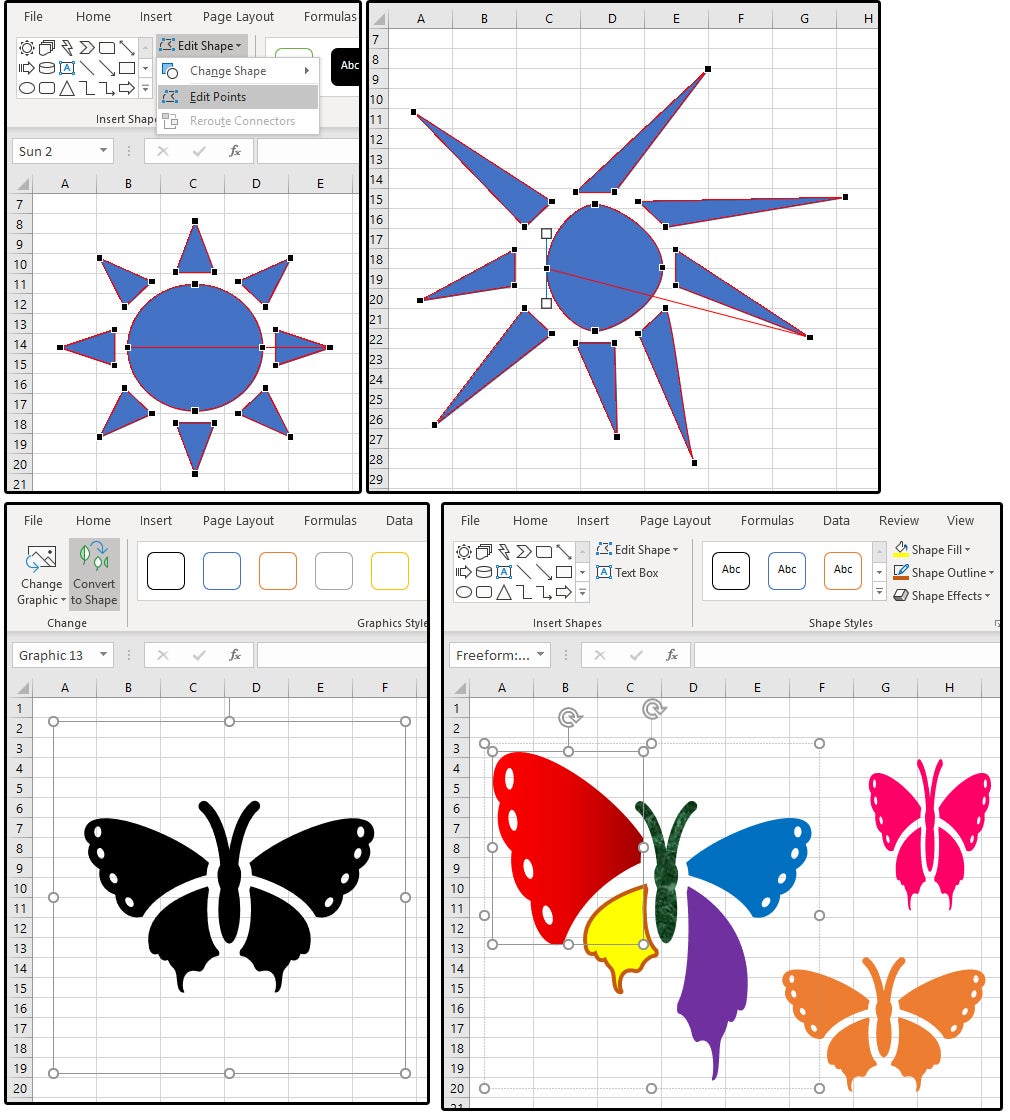
1. When you insert a Shape into an Excel spreadsheet, the DRAWING TOOLS tab appears as long as the shape is selected. Select Edit Shape (in the first box on the Ribbon Menu), then click Edit Points. Notice that Excel adds editing points all over the selected image.
2. Click the points (one at a time) to modify the image and see your results.
3. You can also edit the icons. Insert one from the library (e.g., a butterfly). In its current form, all you can do is size it, distort it, or make it all one color, one pattern, or one gradient, with or without an outline.
4. To edit an icon, select it. Notice that a new GRAPHIC TOOLS tab appears, with a FORMAT tab beneath it displaying the Format Ribbon menu. Click the Convert to Shape button. In the popup menu that asks: ". . . Do you want to convert it to a Microsoft Drawing object?" click the Yes button.
5. Looks like nothing changed, but it did. Hold down the Ctrl key and click one of the butterfly's wings. Notice that all the pieces of the butterfly can be individually selected, modified (as in stretched, squeezed, rotated, etc.). You can also add different colors, patterns, gradients, lines, and special effects to each individual piece of the butterfly; that is, four wings and its body.
 JD Sartain / IDG Worldwide
03 Editing the Illustrations
Custom Formatting/designing the Illustrations
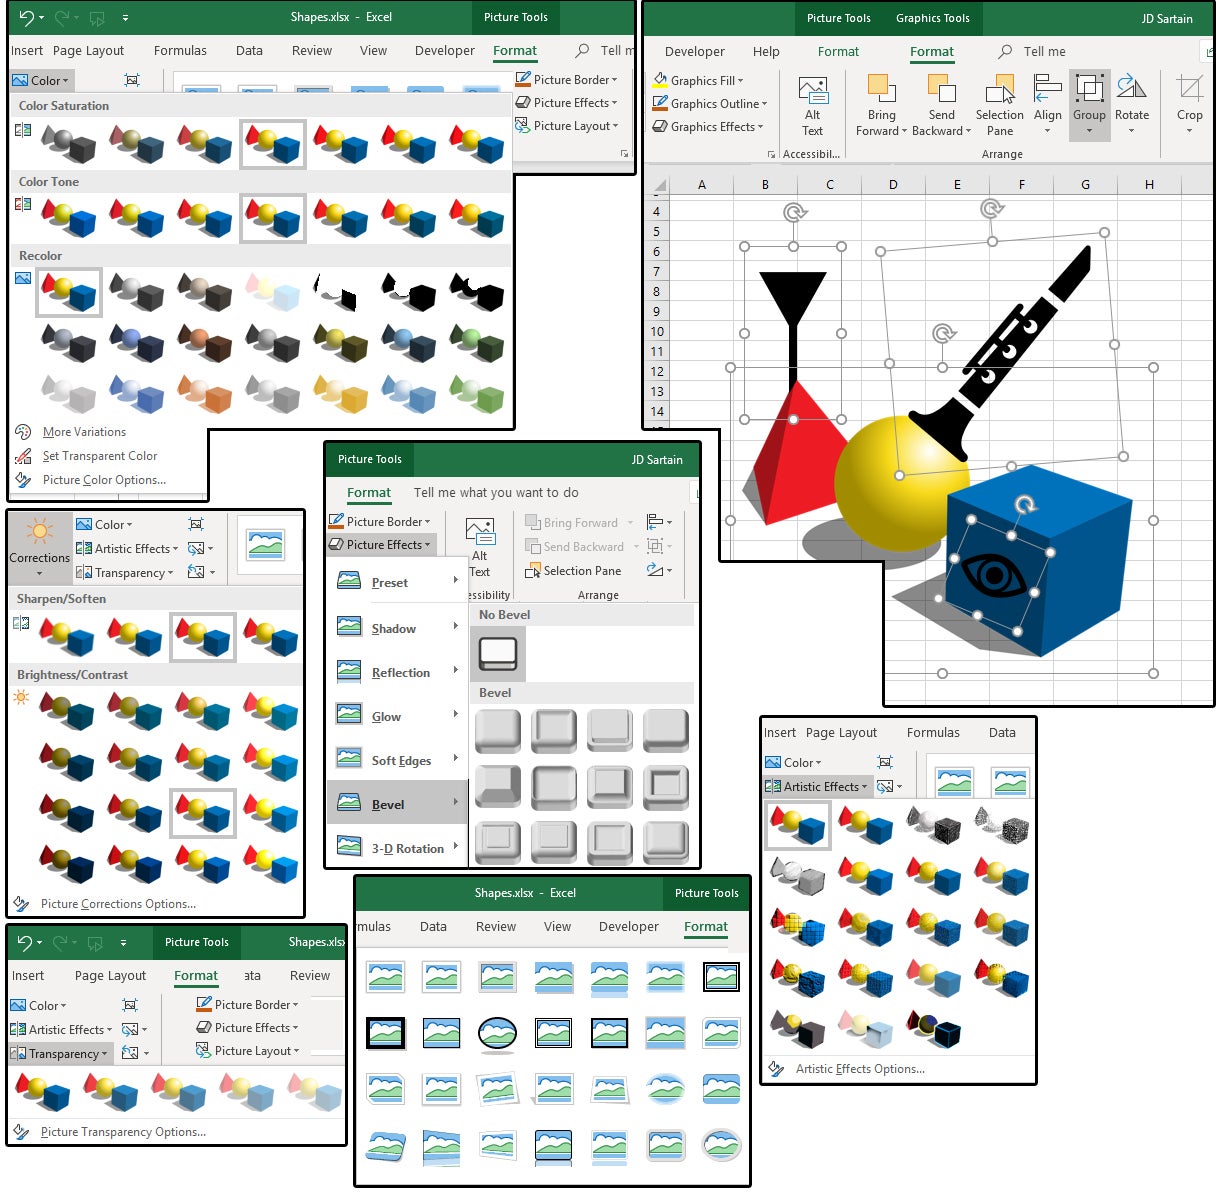
1. In Excel, the term for custom-designing the attributes of an image is called formatting. When an image is selected, the FORMAT tab appears, showing all the formatting options and features for that particular image.
2. Formatting in Excel includes Color, Artistic Effects, Transparency, Styles, Borders, seven Picture Effects (with lots of custom or preset features in each Effect), and Picture Layouts.
3. You can also do Color Corrections and Remove the Background of an image that contains more than just the "floating" object.
4. As mentioned above, images can be flipped, rotated, scaled, distorted, grouped, aligned, cropped, or sent forward or back.
 JD Sartain / IDG Worldwide
04 Custom Formatting the Illustrations
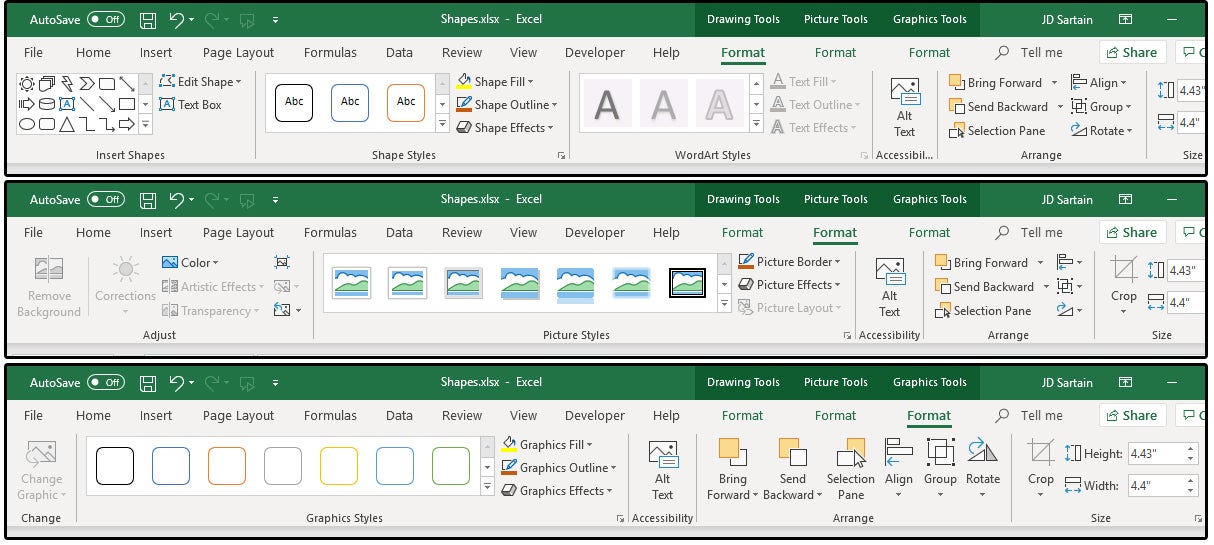
5. The FORMAT tab includes three different sets of tools: Drawing Tools, Picture Tools, and Graphics Tools. These sub-tabs (even though they appear above the FORMAT tab) are displayed based on the object selected—Illustrations, Pictures, or Graphics.
6. Load some images and experiment with the formatting options until you feel comfortable with the different menus.
 JD Sartain / IDG Worldwide
05 Drawing Tools, Picture Tools, Graphics Tools menus
Không có nhận xét nào:
Đăng nhận xét